close
Choose Your Site
Global
Social Media
Views: 0 Author: Site Editor Publish Time: 2026-06-29 Origin: Site


Drilling deep, large-diameter holes in timber framing, cabinetry, or rough carpentry requires balancing speed with precision. You must cut through dense fibers efficiently to maintain project momentum. The wrong bit leads to severe heat buildup, stalled drill motors, blown-out exit holes, or completely ruined workpieces. These issues frustrate carpenters and waste expensive lumber on the job site.
We designed this comprehensive guide to transition you confidently from browsing to buying. You will learn how to evaluate the mechanical components of various designs. We will teach you how to match specific bit geometries to different wood species accurately. Finally, you will discover field-tested techniques for avoiding common operational failures. This knowledge guarantees cleaner holes and extends the lifespan of your cutting tools.
Application Dictates Pitch: Coarse lead screws are for rapid boring in softwoods; fine lead screws are essential for hardwoods to prevent drill stalling.
Torque Management: A hex shank auger bit is non-negotiable for high-torque applications to prevent chuck slippage.
Flute Clearance is Critical: Deep boring requires wide, continuous flutes; poor flute design is the primary cause of bit binding and overheating.
Tool Compatibility: High-torque, low-speed corded drills or robust 18V/20V cordless drills are required; impact drivers often lack the sustained torque for large-diameter deep boring.
Selecting the right drilling tool dictates the success of heavy structural work. Many users default to basic accessory kits, but these often fail under heavy loads. Understanding your performance baseline helps you justify investing in specialized boring tools.
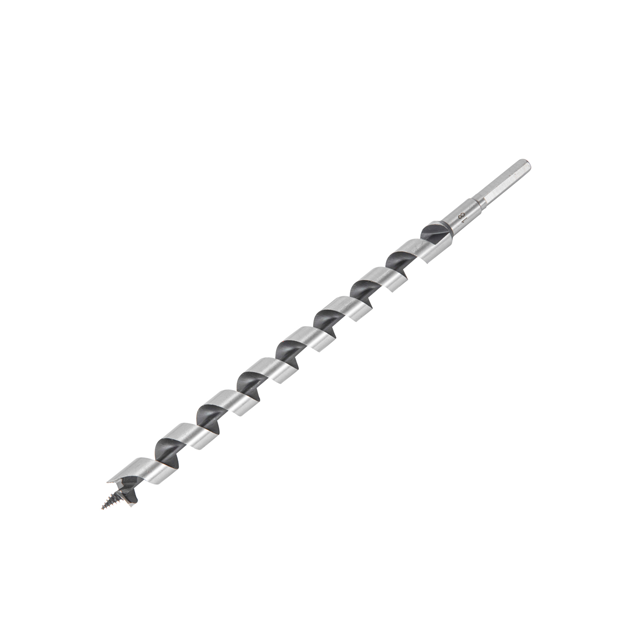
Unlike standard spade bits, which tear through wood fibers and lack directional stability, Wood Auger Bits deliver superior control. Spade bits tend to wander off-center when drilling past a few inches. Standard twist bits also struggle in deep applications. They possess shallow flutes that clog quickly with damp sawdust. In contrast, manufacturers design augers specifically for deep, self-feeding, straight bores. They pull themselves through the material while continuously expelling waste.
Boring depths exceeding 2 inches: The long, continuous flutes easily carry shavings up and out of deep cavities.
Running wiring or plumbing: Electricians and plumbers rely on these tools to punch straight paths through multiple wall studs or thick floor joists.
Timber framing and log home construction: Large-scale structural joinery requires perfectly cylindrical, deep dowel peg holes to secure heavy beams.
Drilling thin sheet goods: Plywood and MDF splinter easily under aggressive self-feeding threads. You should use brad-point bits for these delicate panels.
Shallow, wide holes: If your project requires a perfectly flat-bottomed hole for hinges or hardware, always switch to Forstner bits instead.
You cannot judge a cutting tool purely by its price tag. You must examine its physical geometry. Every curve and angle serves a specific mechanical purpose during the cutting process.
The lead screw acts as the steering mechanism for the entire tool. It sits at the very tip and initiates contact with the timber.
Function: It actively pulls the bit through the wood grain. This mechanism eliminates the need for you to apply excessive physical downward pressure. The drill motor provides the rotation, and the screw provides the forward thrust.
Evaluation Criteria: Always inspect the thread depth before purchasing. Stripped, shallow, or poorly machined threads cause the tip to spin in place. It will merely burn the wood rather than advance. A high-quality lead screw features sharp, well-defined threads that bite instantly.
Once the lead screw pulls the tool inward, the cutting lips and spurs take over the actual material removal.
Function: The spur acts like a precision knife. It scores the outer circular edge of the hole first. It severs the wood fibers cleanly. Right behind it, the cutting lip acts like a chisel. It scoops out the interior material inside that scored circle.
Evaluation Criteria: Look for dual spurs if you need the absolute cleanest entry point. Cabinetry and fine carpentry demand this dual-spur design. Single-spur designs remain acceptable for rough-in utility work. However, they may cause slight surface splintering when they first break the wood surface.
Heat is the ultimate enemy of cutting steel. The flute design manages this heat by removing friction-causing waste.
Function: The flute grabs the loose waste material and carries it up and out of the bore. Efficient ejection prevents the tool from jamming halfway through a joist.
Evaluation Criteria: You must choose between rigidity and clearing speed. Solid center augers feature a single continuous flute wrapped around a thick, solid core. They offer much higher rigidity, which keeps your bore perfectly straight. Hollow or open-spiral designs (often called ship augers) feature a wider channel. They clear heavy, wet chips much faster. However, they are slightly more prone to flexing if you hit a dense knot.
Flute Design Comparison Table | |||
Design Type | Core Structure | Primary Advantage | Best Use Case |
|---|---|---|---|
Solid Center | Thick central steel shaft | Maximum rigidity and straightness | Precision dowel holes, timber framing |
Ship Auger (Open Spiral) | Hollow or minimal center shaft | Aggressive, rapid chip clearing | Wet lumber, rough electrical framing |
Wood density drastically changes how a cutting tool behaves. You must adapt your tool selection based on the specific species of timber you intend to drill.
Hardwoods possess incredibly dense grain structures. Using an aggressive, coarse-threaded tool in oak, hickory, or maple usually invites disaster. The coarse screw grabs too much dense material instantly. It forces the cutting lips deeper than the drill motor can handle. This instantly stalls the drill or violently twists your wrist. This kickback poses a serious safety hazard on the job site.
Softwoods require speed and aggression. Choose coarse-thread lead screws for lighter materials. These threads grab huge chunks of grain per revolution. They advance rapidly through pine, fir, and spruce studs. This aggressive geometry optimizes your labor time when tackling extensive rough framing tasks.
Dense materials require patience and control. You must choose fine-thread lead screws for hardwoods. The tighter thread pitch dictates a much slower feed rate. It allows the cutting lips to take micro-shavings instead of massive chunks. This careful pacing manages the dense wood fibers effectively. It prevents overwhelming the drill motor and protects your wrists from sudden torque spikes.
Sometimes you lack the perfect tool for the job. If you must use a standard aggressive bit on dense hardwood, you can modify it safely. Consider filing off the lead screw threads slightly using a metal file. This simple alteration converts it from a self-feeding tool into a manual push-feed tool. You will successfully regain manual control over the forward feed rate, practically eliminating the risk of binding.
The connection point between your drill and your cutting tool experiences massive rotational stress. Choosing the wrong shank design guarantees operational failure during heavy tasks.
Standard round shanks rely entirely on friction to stay secure. Under high torque scenarios, this friction fails. This is incredibly common in deep, wet-wood boring. The round shank will inevitably spin loose inside a standard three-jaw drill chuck. This slippage galls and damages the metal shank. It halts your progress entirely and often ruins the chuck jaws over time.
You must upgrade your tool interface for professional results. Utilizing a hex shank auger bit solves chuck slippage permanently.
Mechanical Lock: The flat sides of the hex design provide a solid mechanical stop against the chuck jaws. The jaws physically block the shank from spinning. This ensures 100 percent torque transfer from the motor directly into the wood.
Quick-Change Compatibility: Standard 1/4-inch or 7/16-inch hex shanks allow rapid tool swapping. They snap securely into heavy-duty impact wrenches or quick-release extensions. This modularity speeds up your workflow significantly.
Heavy-duty boring requires heavy-duty machinery. Standard homeowner drills often lack the necessary gear reduction.
Verify the Side Handle: Ensure your drill features a robust secondary side handle. The self-feeding nature of these tools generates massive rotational force. If the cutting lips catch a hidden knot, the drill body will spin violently. A long side handle gives you the leverage needed to maintain control.
Select the Right Gear: Always run your drill in its lowest speed setting (Gear 1). Low speed provides maximum torque. High-speed settings will overheat the cutting edges and stall the motor prematurely.
Stance and Bracing: Never drill deep holes while standing off-balance on a ladder. Brace your body and prepare for sudden stops.
Professional tools must endure harsh job site conditions. Material chemistry and surface treatments dictate how long your investment will actually last.
Manufacturers craft most high-quality options from High-Carbon Steel (HCS). HCS provides an excellent balance of edge retention and flexibility. This slight flexibility prevents the long shaft from snapping under lateral stress. While highly durable, HCS remains susceptible to surface rust. It will also dull quickly if you accidentally strike hidden nails or screws.
Bare steel creates significant friction against damp wood fibers. You should evaluate bits featuring advanced surface treatments to combat this.
Common Surface Coatings Chart | ||
Coating Type | Primary Benefit | Drawback |
|---|---|---|
Uncoated / Bare HCS | Lowest initial purchase price. | High friction; rusts easily if left damp. |
Black Oxide | Resists corrosion; holds lubrication well. | Eventually wears off along the cutting edges. |
PTFE (Teflon) | Massively reduces friction; sheds sticky resin. | Higher cost; coating scratches on hidden nails. |
PTFE or black oxide coatings drastically reduce friction deep inside the bore. This friction reduction extends battery life noticeably in cordless tools. It also minimizes heat-induced metal fatigue, keeping the cutting edges harder for longer.
Even the best steel eventually dulls. Check the throat clearance before buying a new tool. A credible design allows enough physical room for an auger bit file. You need this specialized taper file to reach and touch up the cutting lips and spurs. You can perform this maintenance right on the tailgate of your truck. Disposable or unusually cheap bits often lack proper throat geometry. You cannot easily resharpen them, forcing you to throw them away prematurely.
Selecting the correct boring tool fundamentally changes your workflow efficiency. You avoid ruined materials, prevent wrist injuries, and finish framing tasks faster.
Final Decision Logic: Do not default to the cheapest set on the rack. Select your tool based on the wood density of your primary projects to determine the correct thread pitch. Factor in your required bore depth to choose between solid center or ship auger flutes. Finally, evaluate your drill's chuck interface. Always insist on a hex shank to prevent frustrating slippage.
Next Steps: Measure your drill's maximum chuck capacity. Knowing if you have a 3/8-inch or 1/2-inch chuck ensures you buy compatible, larger shanks.
Smart Purchasing: Consider purchasing a single high-quality bit in your most-used size first. Test its balance and clearing speed before investing heavily in a comprehensive 13-piece set.
Field Maintenance: Buy a specialized taper file immediately. Keep it in your toolbox to touch up cutting spurs the moment they show signs of dulling.
A: Yes, provided they have a compatible hex shank. However, impact drivers often lack the continuous rotational torque needed for holes wider than 3/4-inch. This deficit causes the tool to endlessly "hammer" without actually advancing into the wood. A heavy-duty corded or 18V drill is generally preferred for smoother, faster results.
A: This is usually caused by inadequate chip clearance. Damp wood quickly clogs the flutes. Hitting a hidden knot or nail will also stop progress instantly. Using a drill with insufficient torque is another common culprit. Always back the bit out periodically while drilling to clear the packed flutes.
A: Stop drilling as soon as the tip of the lead screw pokes through the back of the wood. Remove the bit entirely. Go to the opposite side, place the lead screw in that small exit hole, and finish drilling inward. This technique guarantees perfectly clean edges on both sides.