Please Choose Your Language
close
Choose Your Site
Global
Social Media
Views: 0 Author: Site Editor Publish Time: 2026-08-28 Origin: Site


Nothing is more frustrating on a timber frame site than spending 30 minutes hogging out a single mortise. You know the struggle well. Wandering peg holes and jammed drills grind your productivity to an absolute halt. These bottlenecks usually happen because builders select the wrong bit size or rely on an inefficient tool design. Selecting the exact diameter and style of your drilling tools directly dictates joint integrity. It guarantees structural compliance. It also keeps your on-site labor efficient, predictable, and safe. Every millimeter matters when boring into heavy structural timbers. This guide covers everything you need to optimize your framing workflow. We explore the standard diameters required for mortises and pegs. We review strict evaluation criteria for bit geometry. We also break down exactly how you can avoid catastrophic deep-drilling failures on site. By the end, you will know precisely which tools belong in your kit.
The most critical diameters for timber framing are typically 3/4", 1", 1-1/2", and 2", aligning with standard peg and chisel sizes.
Bit geometry (lead screw pitch and flute smoothness) matters just as much as diameter for clearing thick chips in deep timbers without drill bind-up.
Matching bit diameter precisely to your chisels prevents over-cutting and ensures tight, structurally sound mortise-and-tenon joints.
High-carbon steel bits with precision-milled cutting lips outlast budget options, reducing total tooling costs across a full frame build.
Labor efficiency plummets when you bore and chop a mortise using an undersized bit. Imagine cutting a two-inch wide mortise with a one-inch tool. You must drill two parallel rows of holes. This leaves a ragged center ridge of waste wood. You then spend excessive time hacking out that ridge using a framing chisel. A perfectly matched diameter removes the waste in a single, clean line. You finish the mortise much faster. You keep the project moving forward. Wasted minutes on individual joints quickly add up to days lost across an entire frame build.
Precision directly governs structural integrity. Timber framing relies heavily on tight engineering tolerances. Traditional techniques like draw-boring demand exact hole dimensions. Draw-boring offsets the tenon hole slightly from the mortise holes. You drive a tapered peg through the assembly. The peg pulls the joint shoulders tightly together. If your hole is too large, the peg slips freely. You lose all mechanical tension. A loose peg hole severely compromises the shear strength of the entire frame. Precision sizing remains non-negotiable for structural compliance.
Tool wear and equipment strain present hidden risks. Cheap tools cause heavy drill binding deep inside the cut. When a poorly sized tool binds in green oak, your drill fights immense friction. This strain leads to premature motor burnout in expensive high-torque drills. Worse, sudden drill kickback poses a serious injury risk. A snagged bit transfers violent rotational force directly to your wrists. Properly sized, high-quality tools cut smoothly. They protect both your machinery and your crew.
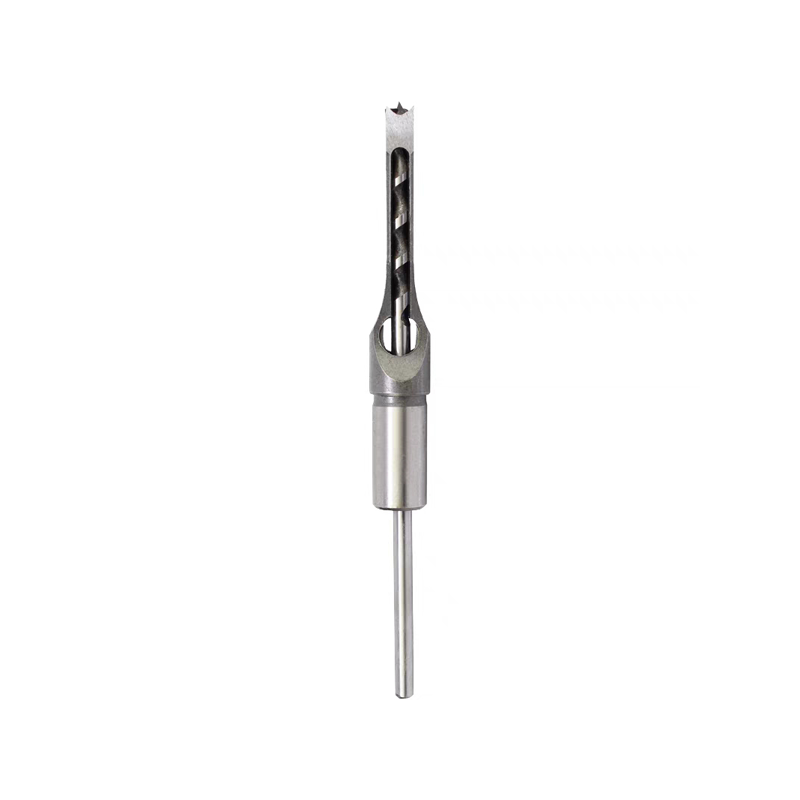
Trunnels, or wooden pegs, require strict standard sizing. Most traditional timber frames rely on pegs measuring 3/4 inch or 1 inch in diameter. You cannot eyeball these holes. You need a Precise Wood Drill Bit. It must match your peg diameter flawlessly. This exact match ensures a tight friction fit. The peg must compress slightly as it drives home. If the hole is too tight, driving the peg will split the timber face. If it is too loose, the joint will rack over time.
Mortise dimensions entirely dictate your waste removal strategy. Typically, mortise widths range from 1 inch to 2 inches. The best operational strategy matches your auger diameter exactly to the mortise width. For example, use a 1-1/2 inch diameter tool for a 1-1/2 inch wide mortise. This eliminates lateral chisel work completely. You rely on the overlapping hole technique to clear the cavity. You bore a series of holes straight down the mortise layout line. Specific diameters stop the cutting edges from drifting into adjacent voids. You maintain straight, parallel sidewalls ready for a quick chisel paring.
Modern timber frames often incorporate hidden steel flitch plates. You might also install engineered hardware or heavy structural screws. These modern components demand smaller diameters. They typically require 1/2 inch to 5/8 inch holes. You must drill these passages precisely. You bore them just wide enough for the bolts to pass freely. An oversized hole allows the steel plate to shift under heavy snow or wind loads. An undersized hole makes field assembly nearly impossible. Always verify the hardware specifications before you drill.
We must evaluate Wood Auger Bits beyond their sheer width. Geometry strongly impacts daily performance. The lead screw pitch determines how aggressively the tool feeds into the timber. Coarse threads pull the cutting edges faster. However, they demand highly powerful drills to prevent mid-cut stalling. Fine threads give you much better control. They excel in harder woods like white oak. Aggressive feeds in dense species often cause severe surface tear-out. Fine threads let you dictate the cutting pace safely.
Flute design dictates chip ejection capability. Standard ship augers feature a single flute and a wide-open center design. This profile allows large, thick chips to escape the hole. Ultra-smooth fluted designs eject waste even better. Smooth flutes really prove their worth in green, wet wood. Wet timber produces sticky, resin-heavy chips. These chips cling to rough steel surfaces. Smooth flutes prevent this resin buildup. They stop catastrophic bind-ups from happening deep inside the timber cut.
Cutting lip geometry determines the visual quality of the hole. A single cutting edge combined with a sharp scoring spur offers the best results. This geometry scores the outer circumference of the hole first. It severs the wood fibers cleanly before the main lip lifts the chip. This specialized action produces pristine entry holes. You avoid ugly tear-out on the visible face of your structural timbers. A clean cut ensures the peg sits flush and looks professional.
Steel quality directly influences tool longevity. Framers often encounter hidden knots or incredibly dense end-grain. High-carbon steel resists dulling under these harsh conditions. Induction-hardened edges hold their temper much longer. They survive repeated impact with dense knots. Budget tools lose their edge quickly. Once the cutting lip dulls, you must apply heavy downward pressure. This pressure forces the tool to wander off-axis.
Drilling entirely through an 8x8 beam carries significant risks. Bits easily drift off-axis as they plunge deeper. If you lose plumb, your exit hole misses its mark. The mortise-and-tenon joint will fail to assemble correctly. You can mitigate this risk easily. Use dedicated boring machines for absolute vertical accuracy. Alternatively, use heavy-duty drill guides. You can also rely on self-feeding tools featuring long, rigid shanks. A thicker shank flexes less under heavy torque. It helps maintain a perfectly straight trajectory.
Exit-hole blowout ruins the visible face of your timber. This tear-out happens when the cutting lip blasts through unsupported wood fibers at the bottom of the beam. The pressure splinters the face violently. The mitigation strategy requires a two-step process. First, drill downward only until the tip of the lead screw pokes through the bottom face. Stop drilling immediately. Next, flip the heavy timber over. Place the lead screw into the tiny puncture hole. Finish drilling the hole from the opposite side. This technique guarantees perfectly clean edges on both sides of the beam.
Overheating represents a major failure point. Running tools at excessively high RPMs creates extreme friction heat. Augers demand low speed and high torque. High RPMs quickly destroy the temper of the hardened cutting edge. Once you lose that metallurgical temper, the steel turns soft. The tool becomes entirely useless. You cannot restore ruined temper on the job site. Keep your drill speed low. Let the lead screw do the pulling.
Mark your center lines clearly with a sharp awl before starting the lead screw.
Clear chips frequently by backing the tool out of the hole every few inches.
Keep the shank perfectly aligned with your body to sight vertical plumb accurately.
Apply paraffin wax to the flutes when boring into highly resinous pine species.
Never force the drill downward; let the screw threads pull the cutting edges.
Do not use high-speed settings on your drill; friction heat destroys the steel temper.
Avoid drilling through knots if possible; adjust your peg layout slightly if a massive knot sits in the path.
Never leave chips packed in the hole; they will expand and lock the tool permanently.
Shank compatibility dictates whether a tool fits your current power unit. Heavy-duty framing drills utilize quick-change chucks. These require 7/16 inch hex shanks. The hex shape prevents the shank from spinning inside the chuck under massive torque loads. Older or lighter-duty drills might use standard 1/2 inch keyed round chucks. Always verify your equipment specifications before buying new accessories. A mismatched shank renders an expensive tool completely useless on site.
Length selection requires careful thought. You must choose between standard 6-inch, 12-inch, and 18-inch overall lengths. Standard lengths work perfectly for thin knee braces or shallow mortises. Ship auger lengths easily handle thick, deep structural beams. However, keep in mind that 18-inch tools require extreme care. The longer the tool, the harder it is to start perfectly straight. Any slight angle at the entry point magnifies into a massive deviation at the exit point.
Purchasing logic should favor quality over sheer quantity. Recommend buying individual premium tools strictly for the specific diameters your frame design requires. Most frames only need two or three distinct sizes. Do not buy large, low-quality multi-piece sets. Cheap sets waste your tool budget. They feature poor steel and rough flutes. They will bind up, wander off-plumb, and ultimately ruin your expensive timber joints.
Recommended Bit Lengths for Standard Timbers
Timber Thickness | Application | Recommended Overall Length |
|---|---|---|
4 inches or less | Knee braces, shallow mortises | 6 inches |
6 to 8 inches | Standard posts, tie beams | 12 inches |
10 inches or more | Massive girders, deep through-bolting | 18 inches |
The best diameter for your timber framing project is dictated entirely by your specific mortise and peg dimensions. Most traditional and modern frames revolve heavily around the 1-inch, 1.5-inch, and 2-inch marks. Sizing your tools accurately prevents joint failure. It stops you from wasting hours performing unnecessary chisel work. Accuracy guarantees a frame that can withstand massive structural loads for generations.
Investing in a premium, highly machined cutting tool pays immediate dividends. It saves valuable labor hours on site. It protects your expensive drills from motor burnout. Most importantly, it ensures your joints fit together tightly and beautifully. Do not settle for budget tools when building legacy structures.
Take action before your next build begins. Evaluate your structural plans carefully. Note the required joint dimensions and peg sizes. Select the corresponding premium tools that match those measurements exactly. Equip your crew properly, and watch your framing efficiency soar.
A: A standard auger features a solid center spine. A ship auger lacks this center spine. The open center design allows large, thick chips to flow upward freely. This makes ship augers far superior for clearing waste in deep, wet structural timbers without binding.
A: No. Spade bits fail completely in deep structural timbers. They lack efficient chip extraction flutes. They also lack a threaded lead screw to pull them evenly through the wood. They wander severely off-axis and create rough, inaccurate holes.
A: Use a specialized auger bit file. File only the upward-facing edge of the cutting lip. File the inside edge of the scoring spur. Never file the outside edge of the spur. Filing the outside reduces the overall cutting diameter, ruining the exact sizing.
A: Clear the chips frequently. Back the tool out of the hole every two inches to eject packed waste. Ensure you use a low-RPM, high-torque drill. Avoid aggressive feeds; let the fine-thread lead screw do the pulling at its own pace.